Basic Settings
Quick Reference
Before you start using ShootPath, you'll want to configure a few essential settings so your business info appears correctly in emails, invoices, and contracts.
Settings Interface:
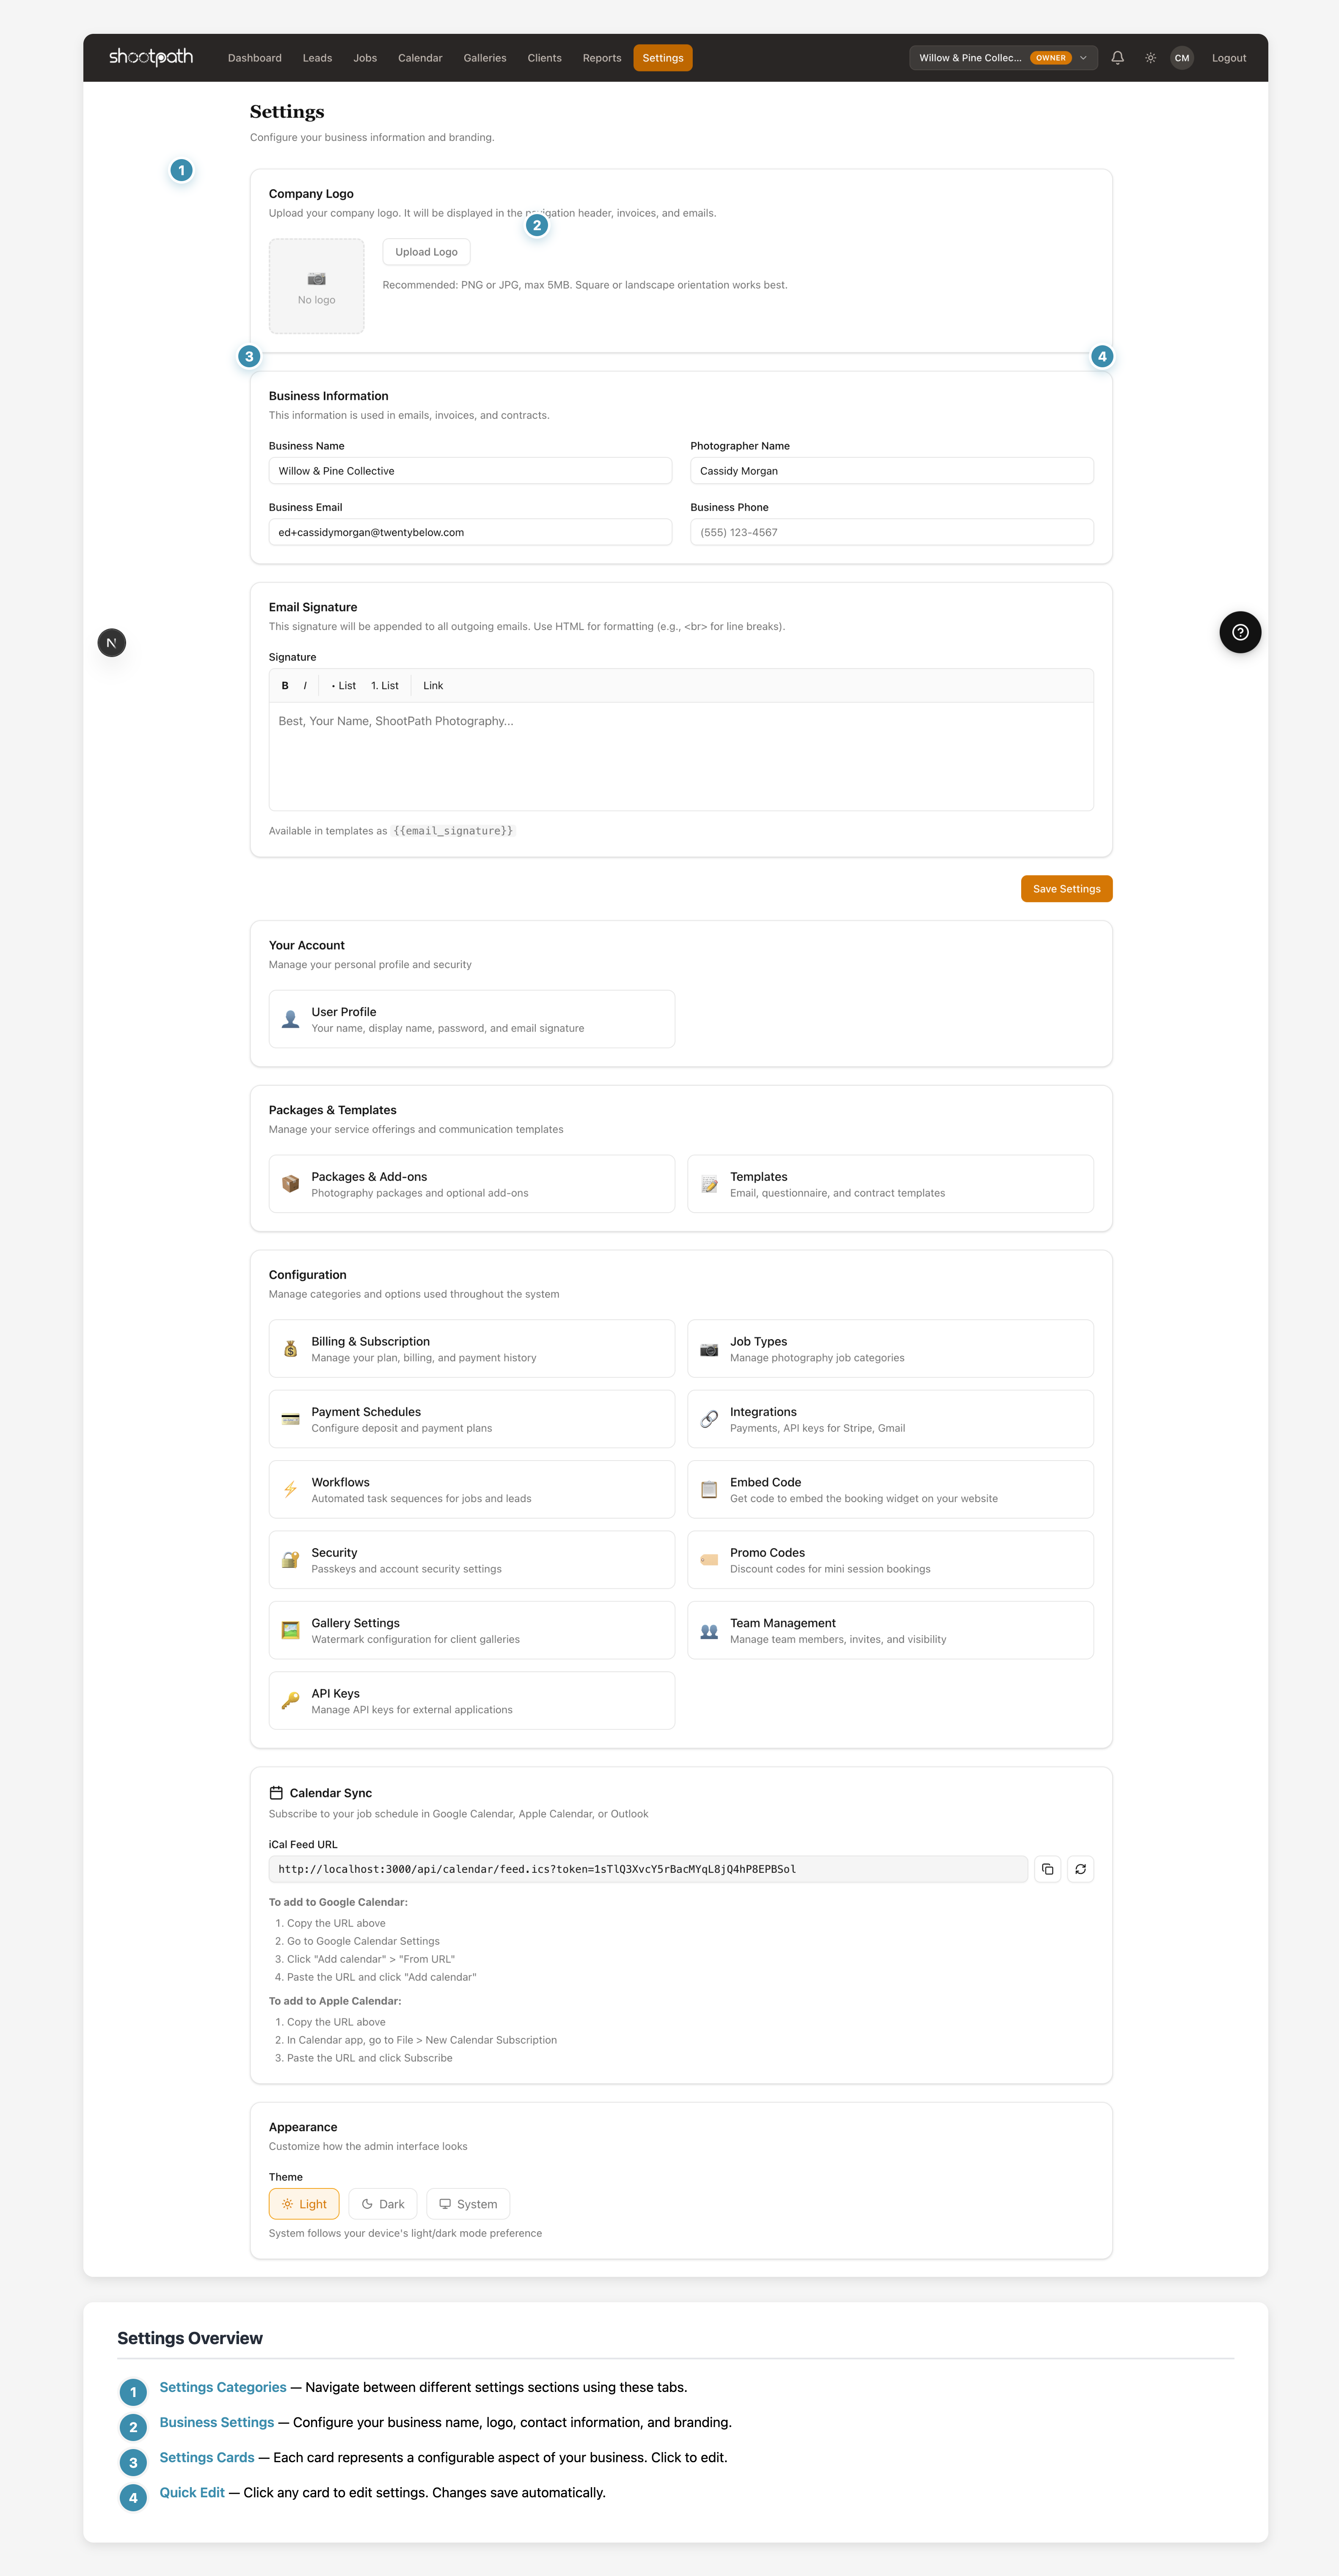
- Settings Categories - Navigate between different settings sections
- Business Settings - Configure name, logo, contact info, and branding
- Settings Cards - Each card represents a configurable aspect
- Save Changes - Changes save automatically when updated
Critical Settings to Configure First:
- Business Information - Your business name, email, and phone
- Photographer Name - How you sign your emails
- Email Signature - Appears at the bottom of all outgoing emails
- Business Logo (optional but recommended)
Where to Find Settings: Click "Settings" in the left sidebar navigation.
What You Can Skip For Now:
- Packages & Add-ons (set these up when you're ready to send your first quote)
- Payment schedules (configure when needed)
- Advanced integrations (Stripe, email, etc.)
- Workflow customization
Quick Setup Time: About 5-10 minutes to get the essentials configured.
Next Steps: Once your basic info is set, head back to the Dashboard and create your first lead!
Detailed Guide
Why Settings Matter
The information you configure in Settings gets used throughout ShootPath:
- Emails to clients - Your business name and signature appear in every email
- Invoices and contracts - Your business info and logo appear on official documents
- Client portal - Clients see your branding when they view quotes and galleries
- Your profile - How your business appears to clients
Taking 10 minutes to set this up now means every client interaction looks professional and polished!
Accessing Settings
From anywhere in ShootPath:
- Look for "Settings" in the left sidebar navigation
- Click it
- You'll land on the main Settings page with your business information
Business Information
This section contains the core details about your photography business.
Business Name
Enter your business name exactly as you want it to appear on invoices, contracts, and emails.
Examples:
- "Sarah Johnson Photography"
- "Willow Creek Studios"
- "J&M Wedding Photography"
Why it matters: This appears on every official document and email your clients receive. Make sure it matches your branding!
Photographer Name
This is YOUR name - the person behind the camera. It's used in email signatures and anywhere ShootPath needs to personalize communication.
Examples:
- "Sarah Johnson"
- "Jamie and Morgan"
- "Alex Rivera"
Tip: If you're a team, you can put both names here!
Business Email
The primary email address for your business. This is where:
- Client replies will go
- System notifications are sent
- Your "from" address for outgoing emails (if you haven't set up SMTP)
Use a professional email:
- ✅ sarah@sarahjohnsonphoto.com
- ✅ hello@willowcreekstudios.com
- ❌ sarahjohnson1987@gmail.com (works, but looks less professional)
Important: Make sure you have access to this email! You'll receive important notifications here.
Business Phone
Your contact phone number. Appears on invoices and contracts so clients can reach you.
Format: Enter it however you prefer:
- (555) 123-4567
- 555-123-4567
- +1 555 123 4567
Email Signature
Your email signature appears at the bottom of every email ShootPath sends on your behalf. This is your chance to add a personal touch!
What to include:
- Your name
- Your business name
- Contact info (phone, website, social media)
- A friendly sign-off
Example:
Best,
Sarah Johnson
Sarah Johnson Photography
www.sarahjohnsonphoto.com
Instagram: @sarahjphoto
(555) 123-4567
Another example:
Looking forward to working with you!

- Jamie & Morgan
Willow Creek Studios
hello@willowcreekstudios.com
The signature editor supports basic formatting - use the toolbar to add bold, italic, links, and line breaks.
Keep it concise! A 3-4 line signature is perfect. Too much info can feel overwhelming.
Company Logo
Upload your logo to make your brand shine! Your logo appears:
- In the navigation header (when you're using ShootPath)
- On invoices and contracts
- In email headers (if you have custom branding enabled)
How to upload:
- Click "Upload Logo"
- Select a PNG or JPG file (max 5MB)
- The logo will upload and display immediately
Logo guidelines:
- Format: PNG (with transparent background) works best
- Size: Square or landscape orientation
- Resolution: High-res for print documents (at least 500px wide)
- File size: Keep it under 5MB
Don't have a logo? No worries! ShootPath works great without one. You can always add it later when you're ready.
What You Can Configure Later
Settings has a lot of options, but you don't need to configure everything right away! Here's what you can skip for now:
Packages & Add-ons
This is where you'll set up your photography packages and optional add-ons. Skip it until you're ready to send your first quote - you can configure it then!
Examples of packages:
- Wedding: Full Day Coverage ($3,500)
- Portrait: Family Session ($350)
- Event: Hourly Rate ($200/hr)
Examples of add-ons:
- Extra hour of coverage (+$200)
- Engagement session (+$400)
- Photo album (+$500)
Payment Schedules
Configure how you split payments (50/50, retainer + balance, etc.). You'll set these up when creating your first quote.
Job Types
ShootPath comes with common job types (Wedding, Portrait, Event, Commercial), but you can add custom ones if you specialize in something specific:
- Newborn Photography
- Real Estate
- Corporate Headshots
- Pet Photography
Templates
Customize your email templates, contracts, and questionnaires. The defaults work great to start, but you can personalize them as you go!
Integrations
Connect Stripe for payments, Gmail for emails, and other services. These are optional and can be set up when you're ready.
User Profile Settings
In addition to business settings, you can configure your personal user profile:
Access it from: Settings > User Profile
What you can set:
- Display Name - How your name appears in the interface
- Password - Change your login password
- Personal Email Signature - Different from business signature if needed
Theme Preference
At the bottom of the Settings page, you can choose your theme:
- Light - Bright interface
- Dark - Easy on the eyes in low light
- System - Automatically matches your device preference
This only affects how YOU see ShootPath - it doesn't change anything for your clients!
Quick Setup Checklist
Here's a simple checklist to get you started:
- Business Name - Set your photography business name
- Photographer Name - Add your name
- Business Email - Set your primary contact email
- Business Phone - Add your phone number
- Email Signature - Create a friendly signature
- Logo (optional) - Upload your logo if you have one
Time required: 5-10 minutes
After setup: You're ready to start using ShootPath!
Testing Your Settings
Want to make sure everything looks right? Here's how to test:
- Create a test lead - Make a fake client inquiry
- Send yourself a quote - Use your own email as the client
- Review how it looks - Check that your business name, logo, and signature appear correctly
- Adjust if needed - Go back to Settings and tweak anything that doesn't look right
Tips for Professional Setup
Be consistent - Use the same business name, email, and branding everywhere (website, social media, ShootPath)
Keep it current - If you change your phone number or email, update it here immediately
Test everything - Send yourself a test email or quote to see how clients will experience your branding
Don't overthink it - Simple, clean information is better than trying to be overly fancy. Focus on clarity!
Common Questions
Do I need a business email? No, you can use a personal email like Gmail. But a custom domain email (you@yourbusiness.com) looks more professional!
Can I change these settings later? Yes! You can update your business info, signature, and logo anytime. Changes apply to new emails and documents going forward.
What if I don't have a logo? No problem! ShootPath works great without a logo. You can always add one later as your business grows.
Can I have multiple users? Yes! ShootPath supports team accounts. Each team member can have their own login and personal settings.
What's Next?
Now that your business info is configured, you're ready to start using ShootPath!
Get started with your first client:
- Go to your Dashboard to see your overview
- Create your first lead to track a client inquiry
- Send a quote with your packages and pricing
- Book your first job! 🎉
Want to dive deeper?
- Set up your photography packages
- Customize your email templates
- Configure workflows for each job type
Questions? Look for the help links throughout ShootPath, or reach out to support if you need help!